
Github Pages offers a valuable service by allowing you to host a static website directly from a Git repository. It’s an ideal platform for solo developers to showcase portfolios, support open-source projects, or disseminate information about educational institutions or organizations.
Many prominent projects utilize Github Pages for hosting, including well-known ones like Bootstrap, NormalizeCSS, and Yelp.
This tutorial will walk you through the steps to create and publish a straightforward site using Github Pages. It is assumed that you have a basic understanding of Git and its commands, such as how to create and push commits to a remote repository. If not, I recommend checking out our guide: 30 Basic Git Commands You Should Know.
Let’s get started!
Step 1: Create a Repository
First, you need a Github account to create a repository. You can name the repository anything you like; there are no specific naming requirements.

After creating the repository, the next step is to clone it to your local computer. If you have the Github Desktop application installed, you can easily accomplish this by going to File > Clone Repository within the application.
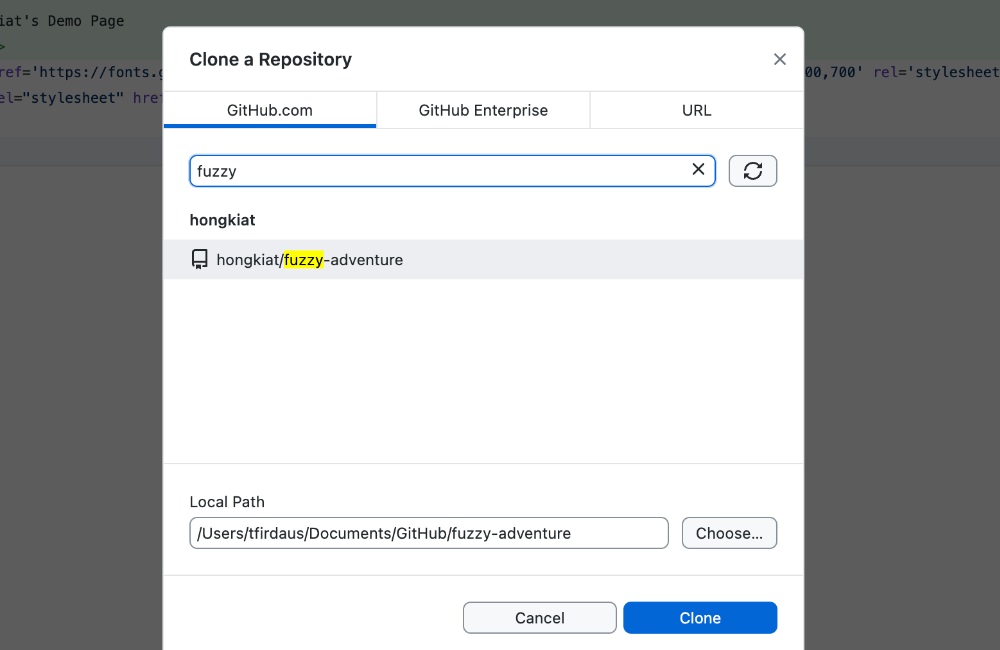
Alternatively, you can clone the repository using the git command-line interface (CLI), for example:
git clone
Step 2: Create the Main Page
To set up a homepage, Github primarily looks for a file named index.html. It can also utilize index.md or README.md. This file can be placed at the root of your repository or within a subdirectory to separate your site from the main source codeâÂÂcommonly in the docs or site directory.
In this example, I’ll demonstrate adding an index.html file in the docs directory, supplemented with styles and scripts from Bootstrap.
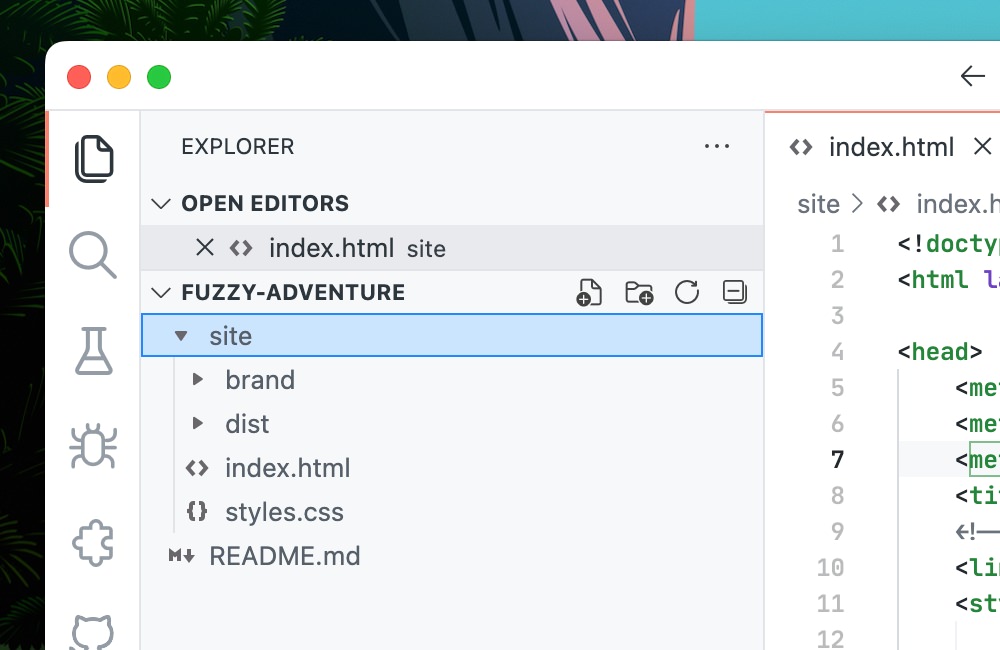
With the files in place, we can now add and push them to the Github repository.
Step 3: Configure Page Deployment
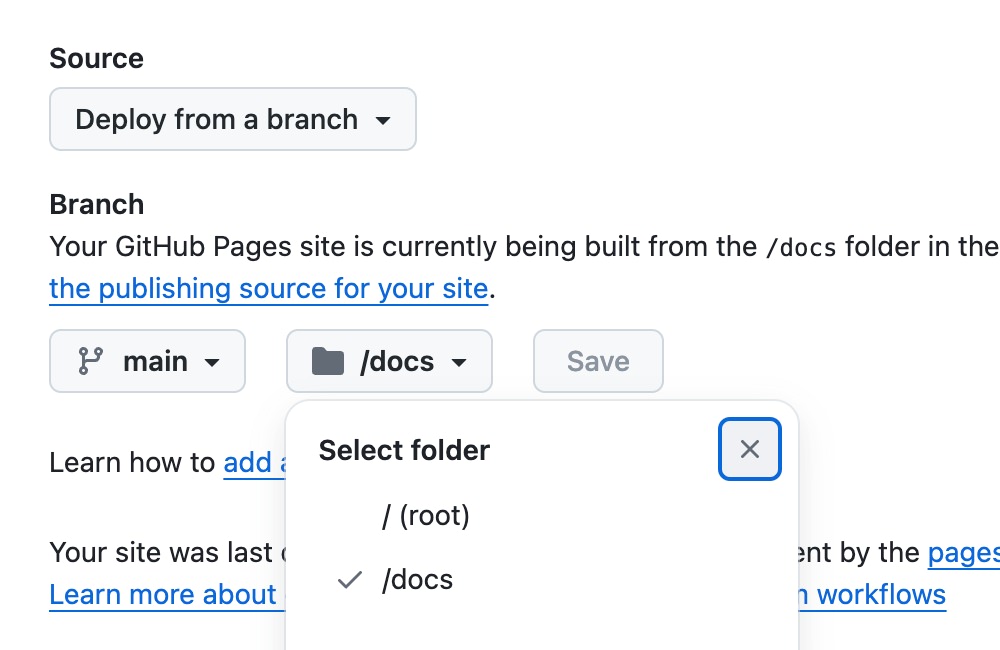
In your Github repository, navigate to Settings > Pages. Here, select the source you wish to deploy as Github Pages. Since we’ve placed the index.html file in the docs directory, choose the appropriate branch and set the directory to /docs under the “Build and deployment” section.
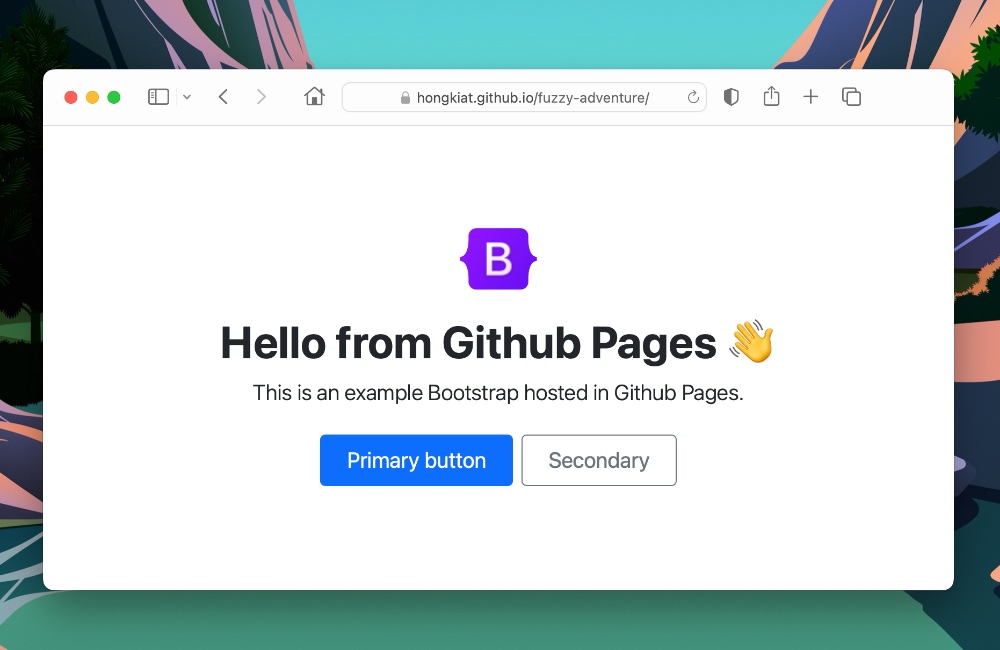
That completes the setup for your Github Pages site. The site will be accessible through a URL pattern provided by Github. For example, if your repository is at github.com/hongkiat/fuzzy-adventure, then your Github Pages site will be at hongkiat.github.io/fuzzy-adventure.
Bonus: Using a Custom Domain
Using a custom domain for your Github Pages site provides a personalized URL that’s easier to remember and enhances your site’s branding. Here’s how to set it up.
Step 1: Add DNS Record
To begin, add a DNS record to link your custom domain to Github Pages. For instance, if you want to use fuzzy-adventure.hongkiat.net, you’ll need to create a CNAME record in your domain’s DNS manager that points to hongkiat.github.io.
If you’re unsure where to find your DNS manager or how to add a new DNS entry, please contact your domain registrar for assistance.
Step 2: Wait for Domain Propagation
After setting the DNS record, it takes some time for the changes to propagate, which can vary from a few minutes to 24 hours. You can monitor with DNS propagation tools like WhatsMyDNS or by using the command below:
dig fuzzy-adventure.github.io +nostats +nocomments +nocmd
Once the DNS propagation is confirmed, you might see results similar to this:

Step 3: Add Domain to Repository
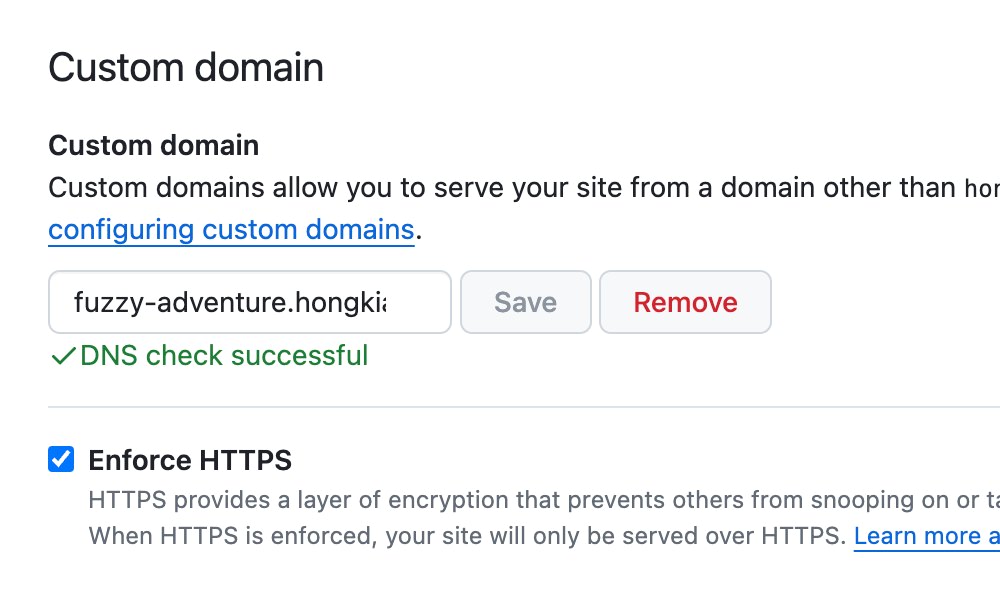
After DNS propagation completes, inform Github about your custom domain. Go to your repository’s Settings, head to the Pages section, and enter your custom domain in the Custom Domain field. Github will verify the domain and set it up. Once verified, you can also secure your site by enabling the “Enforce HTTPS” option.
Now your Github Pages site should be accessible via your custom domain!